The first thing to do is to remove the old panels from the boat. In actuality, this is a bit tougher than it sounds, due to the extensive amount of wiring. There are roughly a dozen wiring harness connectors that have to be unplugged, and they are a bit difficult to access from under the helm station. I recommend removing both panels (instruments and switches) at the same time, to avoid repeat work. Mark everything as you take it apart - you'll never remember where it all goes when reassembly time comes. Here's a close up of the switch panel, from the back:
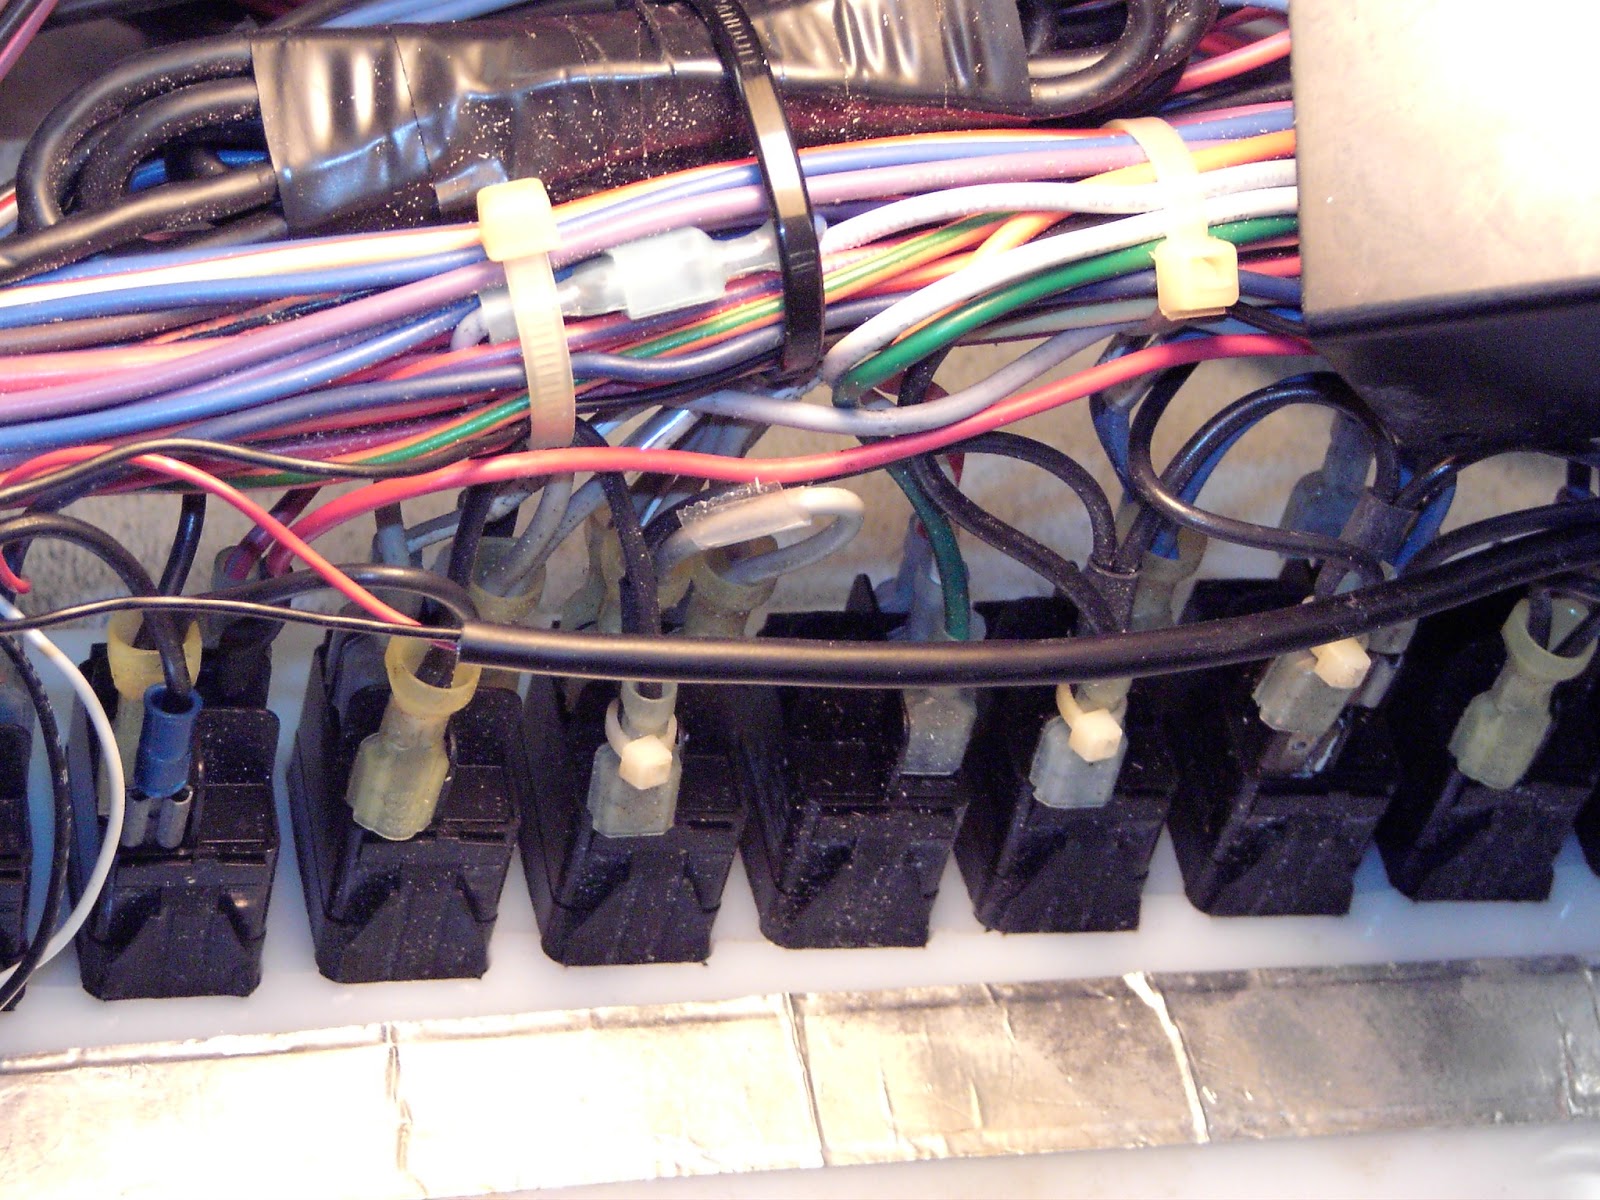
I took about 15 pictures like this. I also very carefully drew a schematic of the wiring harness, carefully laying out the connections for each switch. It's a painstaking process, but makes for a trouble free re-assembly. Once you are confident you have it all mapped out, pull the switches one by one, and transfer them to the new panel. You'll then have something like this:

Now, using the pictures and schematic you prepared, reassemble the wiring harness to the switches.the two foil strips are the backlighting for the panel, so be VERY careful when removing it. They are attached with metallic tape, which I replaced as part of this job. Astute readers will notice that I also have one additional switch now on either side of the Tr-Data display. These cutouts were cut and labelled for me by FP Marine. The extra one on the left is labelled "Fog Signal" (for the Fogmate horn controller), and the one on the right is for the new underwater lights I added this year. Here is the almost completed assembly:

The backlighting strips had been folded by the factory to shorten their length, so it was easy to unfold them to gain the extra length needed for the two new switches. Once they were taped down, I finished the job by adding the additional wires for the new switches, by weaving them into the factory harness, and adding yet another multi-pin connector. The entire thing now looks completely original:

The instrument panel was a lot eaier than the switch panel - the pics below show how it came out:


And, here they are, back in the boat. Sorry for the poor quality of the last pic - it was taken at night with a low level and a cheap camera. I'll replace the pic when I take a better one.
